For those looking to trial Axigen on Proxmox, leveraging the existing Axigen VMware / VirtualBox Image can streamline the process. This guide focuses on deploying Axigen in a Proxmox environment, providing a clear and straightforward method to get your email server up and running quickly. Note that this is distinct from migrating an existing Axigen deployment from VMware to Proxmox, which will be covered in a separate article.

Why Use Proxmox?
As the virtualization landscape evolves, IT professionals are continually exploring alternatives like Proxmox for their virtualization needs. While our focus here is on deploying Axigen for trial purposes, Proxmox’s open-source nature, extensive features, and cost efficiency make it a compelling choice for many.
Step-by-Step Guide to Deploying Axigen in Proxmox
1. Download the Axigen VMware / VirtualBox Image: Begin by downloading the image from the Axigen downloads page.
2. Prepare Proxmox for Image Transfer: Connect to your Proxmox server via SSH and create a folder to store the Axigen image:
mkdir /root/axigen
3. Transfer the Image to Proxmox: Use the scp utility or a graphical interface like WinSCP to transfer the image to your Proxmox server:
scp Axigen-Ubuntu-VM.ova root@<PROXMOX_IP_OR_HOST>:/root/axigen/.
4. Unpack the OVA Image: Once transferred, unpack the image on Proxmox:
cd /root/axigen/
tar xvf Axigen-Ubuntu-VM.ova
5. Import the VM into Proxmox: Use the qm importovf command to import the VM:
qm importovf <VMID> ./Axigen-Ubuntu-VM.ovf <STORAGE_NAME>
Example:
root@pve:~/axigen# qm importovf 220 ./Axigen-Ubuntu-VM.ovf zfs-volume
transferred 0.0 B of 50.0 GiB (0.00%)
transferred 512.0 MiB of 50.0 GiB (1.00%)
transferred 1.0 GiB of 50.0 GiB (2.00%)
transferred 1.5 GiB of 50.0 GiB (3.00%)
...
transferred 49.0 GiB of 50.0 GiB (98.06%)
transferred 49.5 GiB of 50.0 GiB (99.06%)
transferred 50.0 GiB of 50.0 GiB (100.00%)
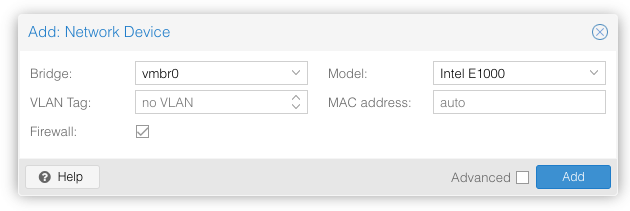
6. Configure Network Settings: In the Proxmox web interface, select the imported VM, go to Hardware, and add a network device.
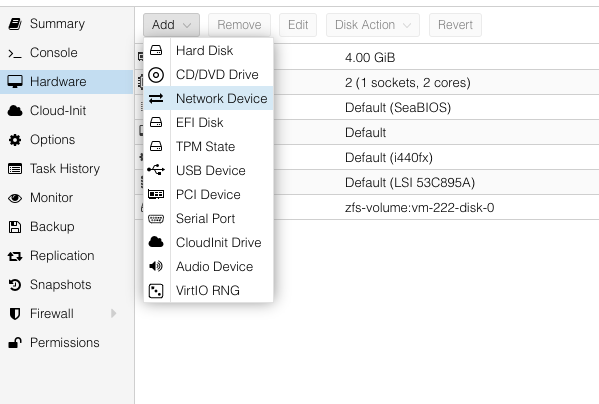
You can either use the default settings or customize them as per your environment.
7. Start the VM: Finally, start the VM and follow the on-screen instructions to connect to the Axigen WebAdmin Interface.
Conclusion
Deploying Axigen in a Proxmox environment for trial purposes is straightforward with the existing Axigen VMware / VirtualBox Image. This guide provides a clear method to set up and evaluate Axigen’s capabilities in a new virtualization environment.
Alternatively, if you want to transition your existing Axigen deployment from VMware to Proxmox, you can refer to our comprehensive guide on migrating an Axigen VM from VMware ESXi to Proxmox.