Updated: August 27, 2024
Content filtering is an important part of your mail server security. Axigen, a powerful mail server, can be configured to provide an out-of-the-box email solution with free antivirus and antispam protection by integrating SpamAssassin and ClamAV. This guide walks you through the process of setting up and running Axigen with these tools using Docker Compose, ensuring robust email security with minimal effort.

Update: We’ve published a new guide for setting up SpamAssassin and ClamAV directly on a Linux server. If you’re not using Docker, this guide will walk you through installing and configuring these tools on RPM-based and DEB-based distributions.
What Are SpamAssassin and ClamAV?
SpamAssassin is a widely-used open-source spam filter that identifies spam using a variety of mechanisms including text analysis and collaborative filtering databases. ClamAV is an open-source antivirus engine that detects a wide range of malware and viruses.
Both tools fall into the “content filtering” category and integrating them with Axigen significantly enhances your email security.
For increased security, we recommend Bitdefender AntiMalware & AntiSpam, which is natively integrated with Axigen. Additionally, consider using the aDNSBL and aURIBL premium blacklists for enhanced spam protection.
Prerequisites
Before you begin, ensure you have the following:
- Docker v26.0.0 or newer and Docker Compose v2.26 or newer installed on your system.
- Basic knowledge of Docker and Docker Compose commands.
Note: In our example, we used the SpamAssassin image provided by instantlinux, however, you can use any SpamAssassin image that is configured to accept connections on port 783. For ClamAV, we chose the official ClamAV image.
Step 1: Create the Docker Compose File
Create a docker-compose.yml file with the following content:
axi-network:
driver: bridge
volumes:
clam_db:
configs:
clamav-pre-init:
content: |
#!/bin/sh
# Set uid 220 and gid 220 to allow clamav to access Axigen queue
sed -i 's/clamav:\([^:]*\):\([0-9]*\):\([0-9]*\):\(.*$\)/clamav:\1:220:220:\4/' /etc/passwd
sed -i 's/clamav:\([^:]*\):\([0-9]*\):clamav/clamav:\1:220:clamav/' /etc/group
filters-ip-config:
content: |
#!/bin/bash
# Obtain spamassassin container IP address
spamassassinHost=$(/usr/bin/host spamassassin)
retCodeHost=$?
if [ $${retCodeHost} -gt 0 ]; then
echo "Unable to obtain spamassassin container IP address"
exit $${retCodeHost}
fi
# Obtain clamav container IP address
clamavHost=$(/usr/bin/host clamav)
retCodeHost=$?
if [ $${retCodeHost} -gt 0 ]; then
echo "Unable to obtain clamav container IP address"
exit $${retCodeHost}
fi
spamassassinIp=$(echo $${spamassassinHost} | awk '{print $$NF}')
clamavIp=$(echo $${clamavHost} | awk '{print $$NF}')
# Update Axigen configuration
currentDate=$(date +%Y-%m-%d-%T)
if [ ! -f /axigen/var/run/axigen.cfg ]; then
# Set ownership for Axigen queue folder
chown -R axigen:axigen /axigen/var/queue 2>/dev/null
echo "Axigen configuration file does not exit !!!"
# This is a hard workaround for setting the IP address for AV:Spamassassin and AV:ClamAV Filters
mkdir -p /axigen/var/run/
cat << EOF > /axigen/var/run/axigen.cfg
Server {
socketFilters = (
{
name = "AV:SpamAssassin"
address = "inet://$${spamassassinIp}:783"
protocolFile = "afsl/spamassassin.afsl"
idleTimeout = 300
actionOnMatch = pass
maxConnections = 10
maxMessageSize = 10240
}
{
name = "AV:ClamAV"
address = "inet://$${clamavIp}:3310"
protocolFile = "afsl/clam-av.afsl"
idleTimeout = 300
actionOnMatch = pass
maxConnections = 10
maxMessageSize = 10240
}
)
}
EOF
else
sed -i.$${currentDate} "s/address = \".*:783\"/address = \"inet:\/\/$${spamassassinIp}:783\"/" /axigen/var/run/axigen.cfg
sed -i.$${currentDate} "s/address = \".*:3310\"/address = \"inet:\/\/$${clamavIp}:3310\"/" /axigen/var/run/axigen.cfg
fi
services:
spamassassin:
image: instantlinux/spamassassin
ports:
- "783:783"
networks:
- axi-network
clamav:
image: clamav/clamav
entrypoint: ["/bin/sh", "-c", ". /pre-init.sh && /init"]
configs:
- source: clamav-pre-init
target: pre-init.sh
ports:
- "3310:3310"
volumes:
# As suggested by clamav docker documentation
# https://docs.clamav.net/manual/Installing/Docker.html#persisting-the-virus-database-volume
- clam_db:/var/lib/clamav
# Mount Axigen queue - ready only
- <AXIGEN_PERSISTENT_VOLUME>/queue:/axigen/var/queue:ro
networks:
- axi-network
axigen:
image: axigen/axigen
command: ["/bin/bash", "-c", ". /filters-ip-config.sh && /axigen/bin/entrypoint.sh"]
configs:
- source: filters-ip-config
target: filters-ip-config.sh
depends_on:
- spamassassin
- clamav
ports:
- "80:80"
- "443:443"
- "993:993"
- "995:995"
- "25:25"
- "465:465"
- "9000:9000"
- "9443:9443"
volumes:
- <AXIGEN_PERSISTENT_VOLUME>:/axigen/var
networks:
- axi-network
Note: Please make sure you replace <AXIGEN_PERSISTENT_VOLUME> with your disk path that will hold Axigen persistent data. Please note that this appears twice in the above file (lines 99 and 121).
Step 2: Create and Start the Containers
To create and start the containers, run the following command:
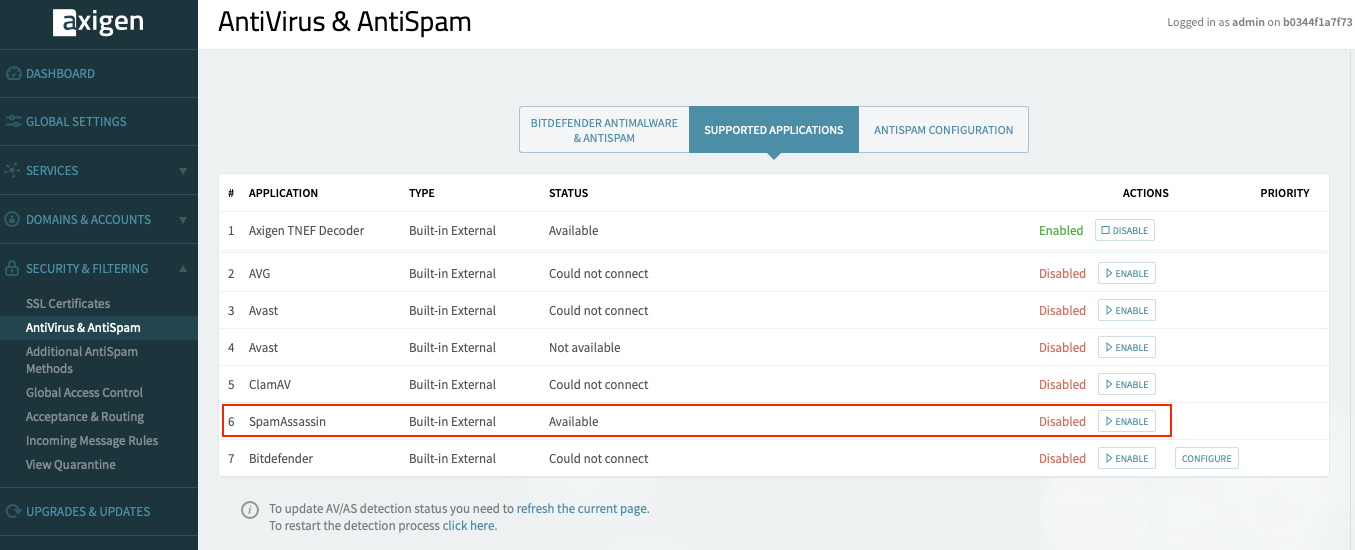
Step 3: Enable the SpamAssassin Filter
After completing the onboarding process, navigate to the WebAdmin interface in Security & Filtering → AntiVirus & AntiSpam → Supported Applications tab and enable the SpamAssassin filter.
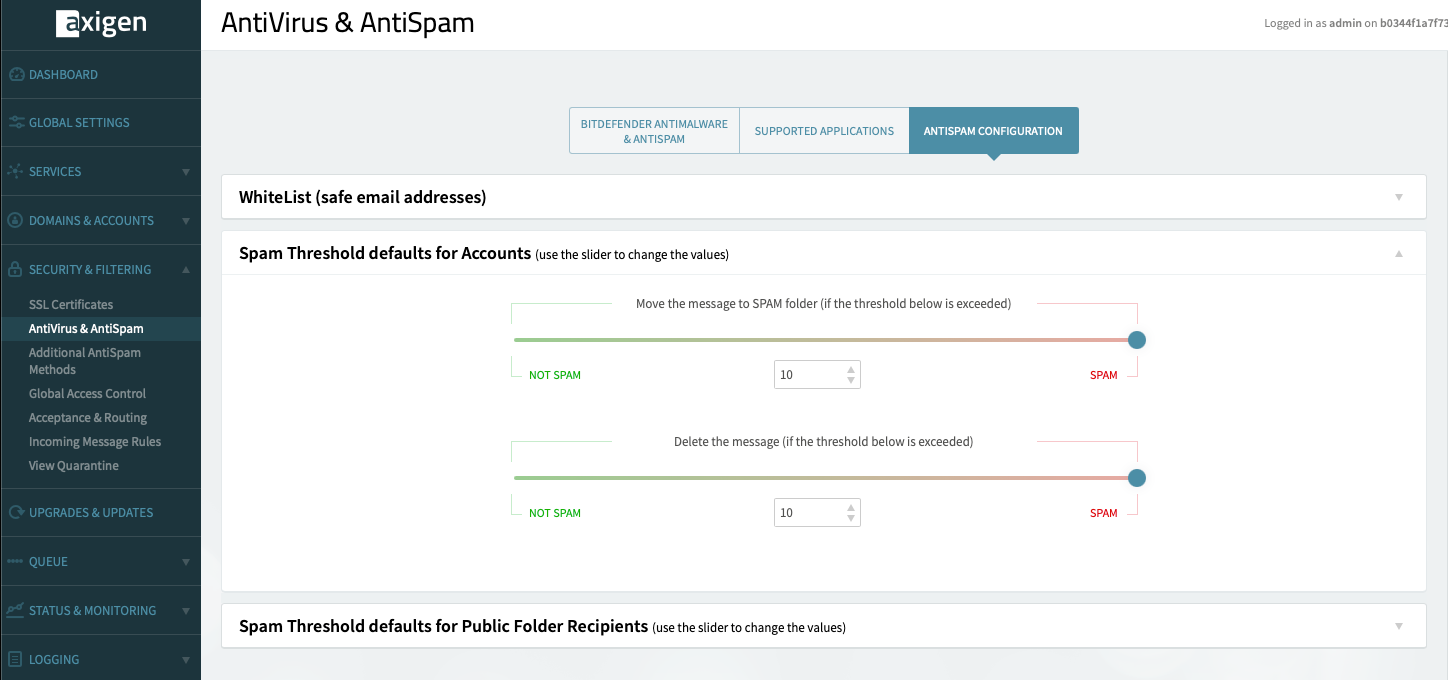
Step 4: Adjust the Spam Threshold
Control the Axigen behavior when spam messages are detected by adjusting the Spam Threshold settings:
- For Accounts: In your WebAdmin interface, navigate to Security & Filtering → AntiVirus & AntiSpam → Antispam Configuration tab → Spam Threshold Defaults for Accounts
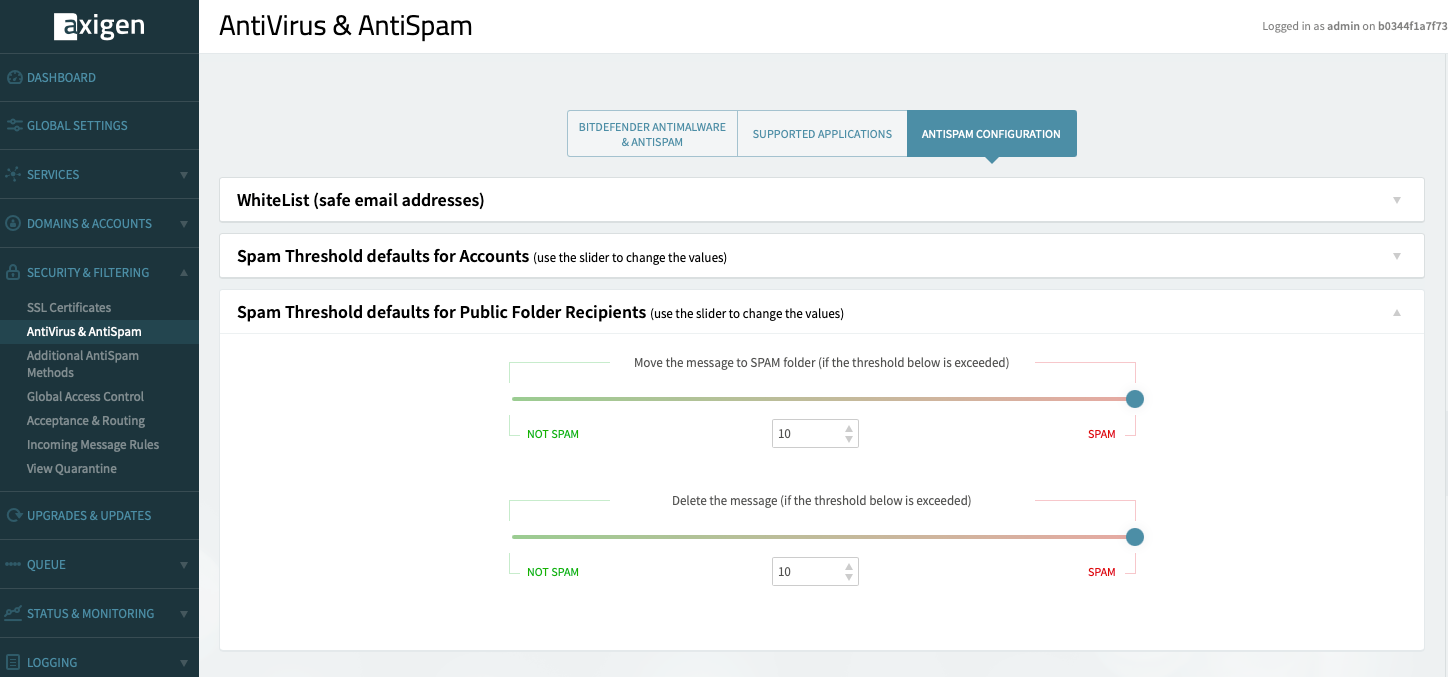
-
For Public Folders: In your WebAdmin interface, navigate to Security & Filtering → AntiVirus & AntiSpam → Antispam Configuration tab → Spam Threshold Defaults for Public Folders
Step 5: Enable the ClamAV Filter
Similarly, enable the ClamAV filter through the WebAdmin Interface.

Step 6: Manage the Infected Messages
After the scan process, each message will have a new “X-AxigenVirus-Level” header with a score between 1 and 5, where 1 is represents a high likelihood of being clean, while 5 represents a high likelihood of being infected.
Based on this header, you can add a rule to handle infected messages. For instance, to move infected messages to the Trash folder and prepend “[VIRUS]” to the subject, open your WebAdmin and navigate to Security & Filtering → Incoming Message Rules → + Add Message Rule, then configure the rule as follows:
- In the “Matches” section: : Custom → X-AxigenVirus-Level → Is → 5
-
In the “Action” section: Change subject → Prepend → [VIRUS], Move to → Trash
By following these steps, you can effectively run Axigen with SpamAssassin and ClamAV using Docker Compose, providing an out-of-the-box email solution with free antivirus and antispam protection.