Solution
Assumptions
For this article, we will presume that Axigen and MailArchiva are already installed on a given machine. First, we will describe the steps needed to configure Mailarchiva and then those specific to Axigen, consequently ensuring that you have an effective and full flavored email server - archiving solution integration.
Configuring MailArchiva
Connect to MailArchiva, by default available at http://<hostname>:8090, and add an SMTP Listener from Configuration → Listeners:

Configuring Axigen
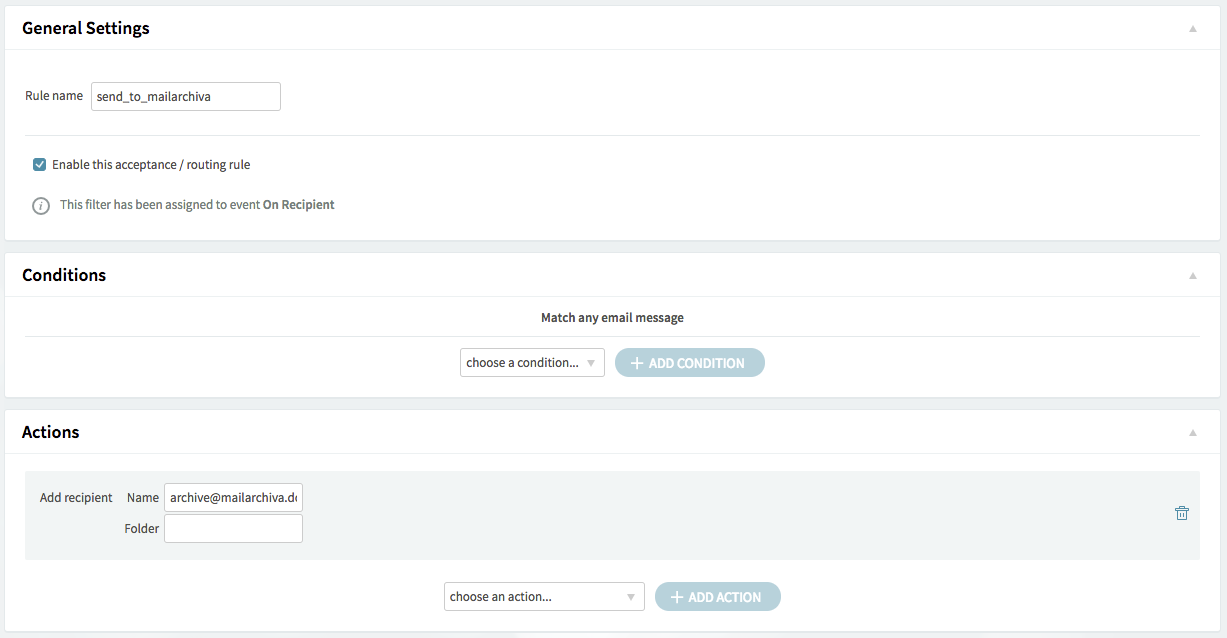
Open the Axigen WebAdmin interface, by default available at http://<hostname>:9000. Login with the admin user and the associated password, then navigate to the following section: Security & Filtering → Acceptance & Routing → Advanced Settings. Here, press the "Add Acceptance / Routing Rule" button.
- type a suggestive Rule name (e.g. "send_to_mailarchiva")
- leave the "Conditions" section without any condition, so that is matches any email message.
- in the "Actions" section, select the "Add recipient" option from the Recipients category and press "Add Action". Type an email address that will be used to send all email messages to MailArchiva (for example "archive@mailarchiva.domain.tld")
- press the "Save Configuration" button.

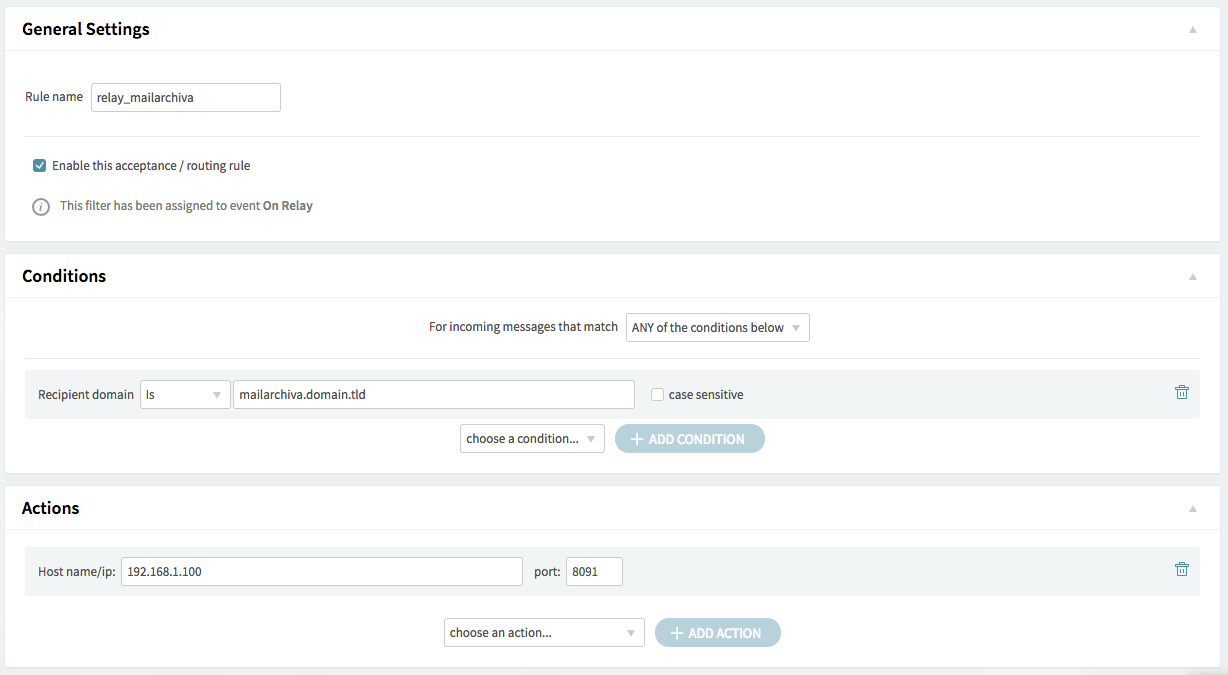
After saving the configuration, press again the "Add Acceptance / Routing Rule" button to add a new rule where you will define the relay host for the MailArchiva email address set in previous rule:
- type a suggestive Rule name (e.g. "relay _mailarchiva")
- in the "Conditions" section, select "Domain" from the "Recipient" category and press "Add Condition". Type the MailArchiva email address set in the previous message (e.g. "archive@mailarchiva.domain.tld")
- in the "Actions" section, select the "Host" option from the "Relay" category and press "Add Action". Type the MailArchiva server IP address and the port set for the SMTP Listener.
- press the "Save Configuration" button.

After this point, all email messages will also be sent to MailArchiva.