How to install Axigen Outlook Connector on Microsoft Windows
Solution
Before running the installation kit, please make sure you have the latest Outlook 2003 patch build and the Outlook application is closed.
Open Axiolk-1.0.1
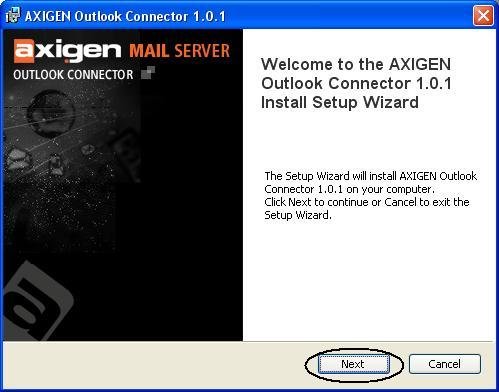
1. Click 'Next' like in the next picture:
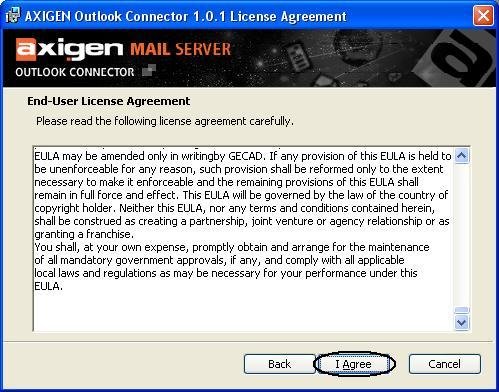
2. Read the End-User License Agreement and if you agree with it, then press 'I Agree' like in the next picture:
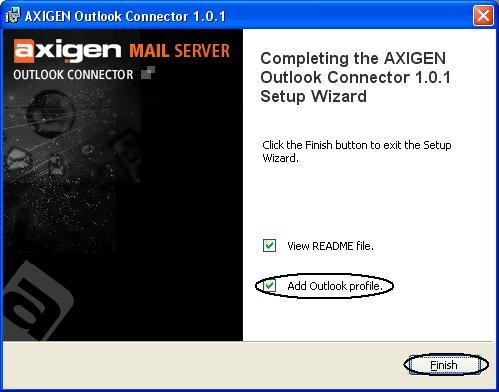
3. After you press 'I Agree', Axigen Outlook Connector is going to be installed. Press 'Finish' and be sure you have 'Add Outlook profile' selected like in the next picture.
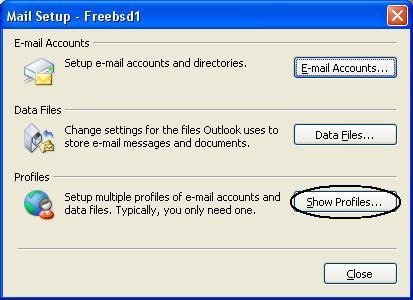
4. If you already have a profile, the opened window will look like the next picture. There, you will need to press 'Show Profiles'. If you don't have any profiles, the opened window will be the one from step 5.
5. Press 'Add' like in the next picture:
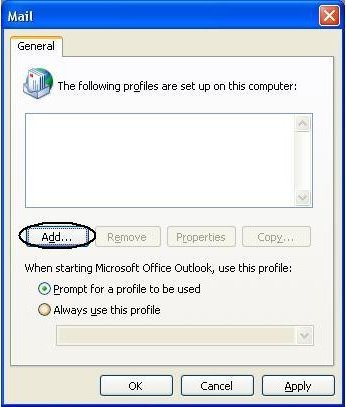
6. In the new opened window, enter a profile name and press 'OK':
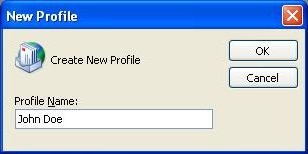
7. Select 'Add a new e-mail account' and press 'Next' like in the next picture:
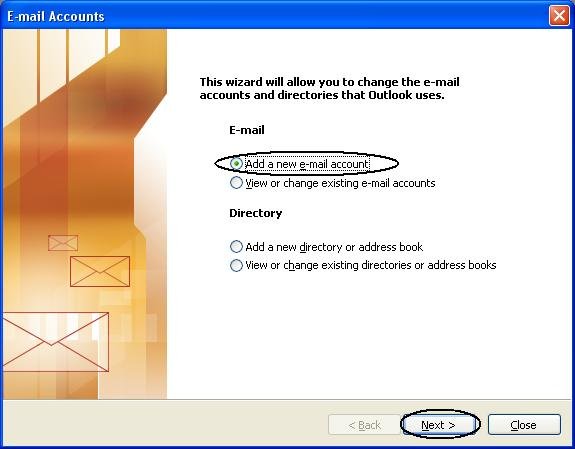
8. Select 'Additional Server Types' and press 'Next' like in the next picture:
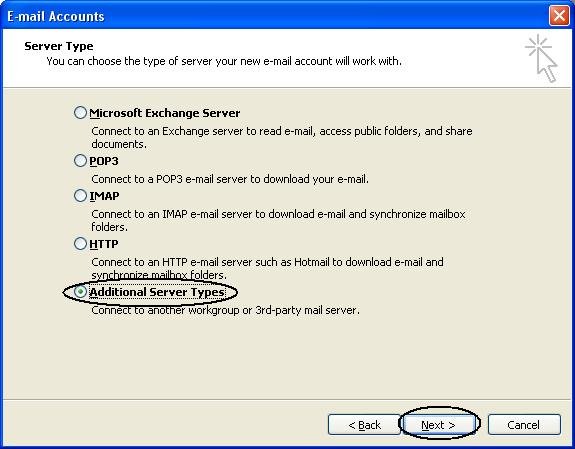
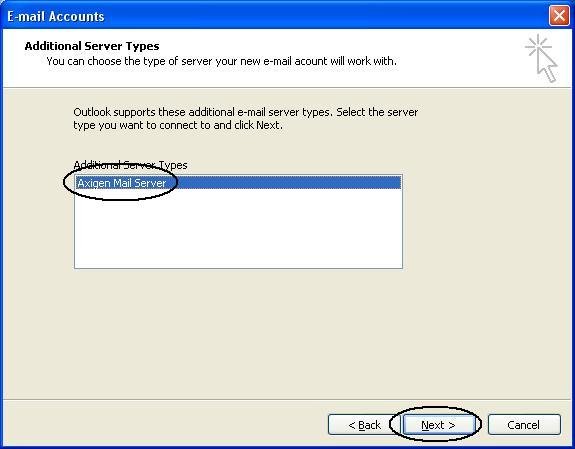
9. Select 'Axigen Mail Server' and press 'Next' like in the next picture:
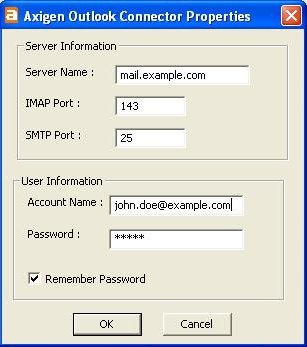
10. In the next window enter the information that you have from your administrator (Server Name, IMAP Port, SMTP Port, Account Name, Password) and press 'OK':
Now you can close all the windows and login to your new profile by starting Outlook and select the just added profile.
Open Axiolk-1.0.1
1. Click 'Next' like in the next picture:

2. Read the End-User License Agreement and if you agree with it, then press 'I Agree' like in the next picture:

3. After you press 'I Agree', Axigen Outlook Connector is going to be installed. Press 'Finish' and be sure you have 'Add Outlook profile' selected like in the next picture.

4. If you already have a profile, the opened window will look like the next picture. There, you will need to press 'Show Profiles'. If you don't have any profiles, the opened window will be the one from step 5.

5. Press 'Add' like in the next picture:

6. In the new opened window, enter a profile name and press 'OK':

7. Select 'Add a new e-mail account' and press 'Next' like in the next picture:

8. Select 'Additional Server Types' and press 'Next' like in the next picture:

9. Select 'Axigen Mail Server' and press 'Next' like in the next picture:

10. In the next window enter the information that you have from your administrator (Server Name, IMAP Port, SMTP Port, Account Name, Password) and press 'OK':

Now you can close all the windows and login to your new profile by starting Outlook and select the just added profile.
OS:
Windows