- Performing Axigen WebMail Single Sign-on
- Deep Linking Emails in Third Party Apps to Open in WebMail
- Integrating Zoom into the WebMail Calendar
- Integrating Microsoft Teams into the WebMail Calendar
- Configuring BIMI for Your Axigen WebMail: A Step-by-Step Guide
- Configuring SMS Connectors for 2-Step Verification and Account Recovery
The SMS connectors functionality is available starting with Axigen X6 (10.6.0).
Learn how to set up and configure SMS Connectors in Axigen to enhance security and convenience for your users. This guide covers the configuration steps for using SMS Connectors to enable 2-Step Verification and Account Recovery, offering an alternative to email and authenticator apps.
Concepts
Starting with Axigen X6 Axigen introduced a new approach to account security. Users now have the option to use their mobile phones to receive SMS for account security. This feature supports 2-Step Verification and helps with recovering usernames and passwords.
Axigen utilizes an SMS Connector to send SMS messages by integrating with third-party SMS Gateways via HTTP. The SMS Connector provides extensive configuration options for HTTP requests, including authentication, request type, and custom parameters.
Once configured, an SMS Connector can be assigned via the built in account restrictions mechanism to one or several domains. Several SMS Connectors can be defined for additional flexibility.
When using an Axigen cluster, this configuration is applied to the Backend nodes only.
Installation and Configuration
Defining an SMS Connector
Here is the list of available configuration parameters:
-
url- set the base URL towards the SMS Gateway. This should not include any query parameters. -
method- choose a HTTP method:GETorPOST. -
contentType- options:-
none- default when usingGET. -
json- sets theContent-Typetoapplication/json -
formUrlEncoded- sets theContent-Typetoapplication/x-www-form-urlencoded.
-
-
Named parameters - these are dynamic parameters for which vary from one SMS message to another.
-
toParamName- The name of the parameter which is contains the destination phone number, -
bodyParamName- The name of the parameter which is contains the message body, -
fromParamName- The name of the parameter which is contains the sender information.
-
-
Static parameters - any other parameters that don’t change between SMS messages. Such parameters are sometimes used for configuring static sender information, message concatenation, flash messages or even authentication.
-
auth- used for configuring authentication schemes by choosing atype:-
none- default, typically used in conjunction with the static params, -
basic- define ausernameandpasswordto be sent in theAuthorizationheader, -
bearer- define atokento be sent in theAuthorizationheader.
-
Via the CLI interface
Here are a few sample configurations:
GET with static parameters
POST with basic auth
Via WebAdmin
Navigate to Global Settings from the left menu and then scroll down to the SMS Connectors section.

Click the “+ Add SMS Gateway” button and configure the needed parameters.
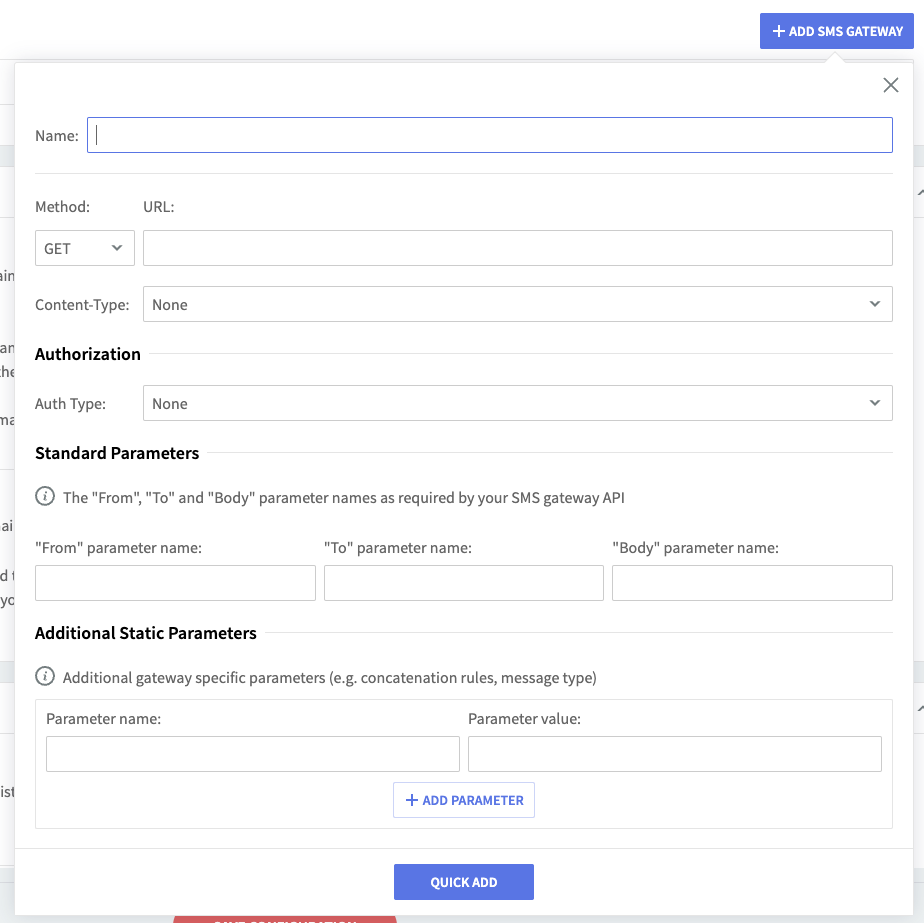
Enabling the SMS Connector and the Phone Number for SMS Notifications
To enable users to configure their mobile phone numbers for account security, the feature must be first enabled from the limits context, either as account defaults for a specific domain, account class or individual account.
Next, the admin needs to select one of the configured SMS connectors.
Finally, the admin can choose to enable SMS for one or several of the following account security features:
-
2-Step Verification
-
Password Recovery
-
Username Recovery
Via the CLI Interface
Here is an example for enabling SMS as account security method for all security features, using the postWithBasicAuth SMS Connector we already defined previously.
Note: Since the authApp method is already enabled, by default when using the set twoFactorAuthCommunicationMethods command, you may choose to keep the authApp method or to use sms method only. In the above example, both methods will be enabled.
In case you would like to have the sms method only, the command will be:
Via WebAdmin
Navigate to the WebAdmin interface -> Domains & Accounts -> Manage Domains -> Select the domain -> Account defaults -> Quotas and restrictions

Scroll down to Account security section
-
Tick the “A phone number (for SMS notifications)” option
-
Select the SMS gateway connector
-
Save the configuration
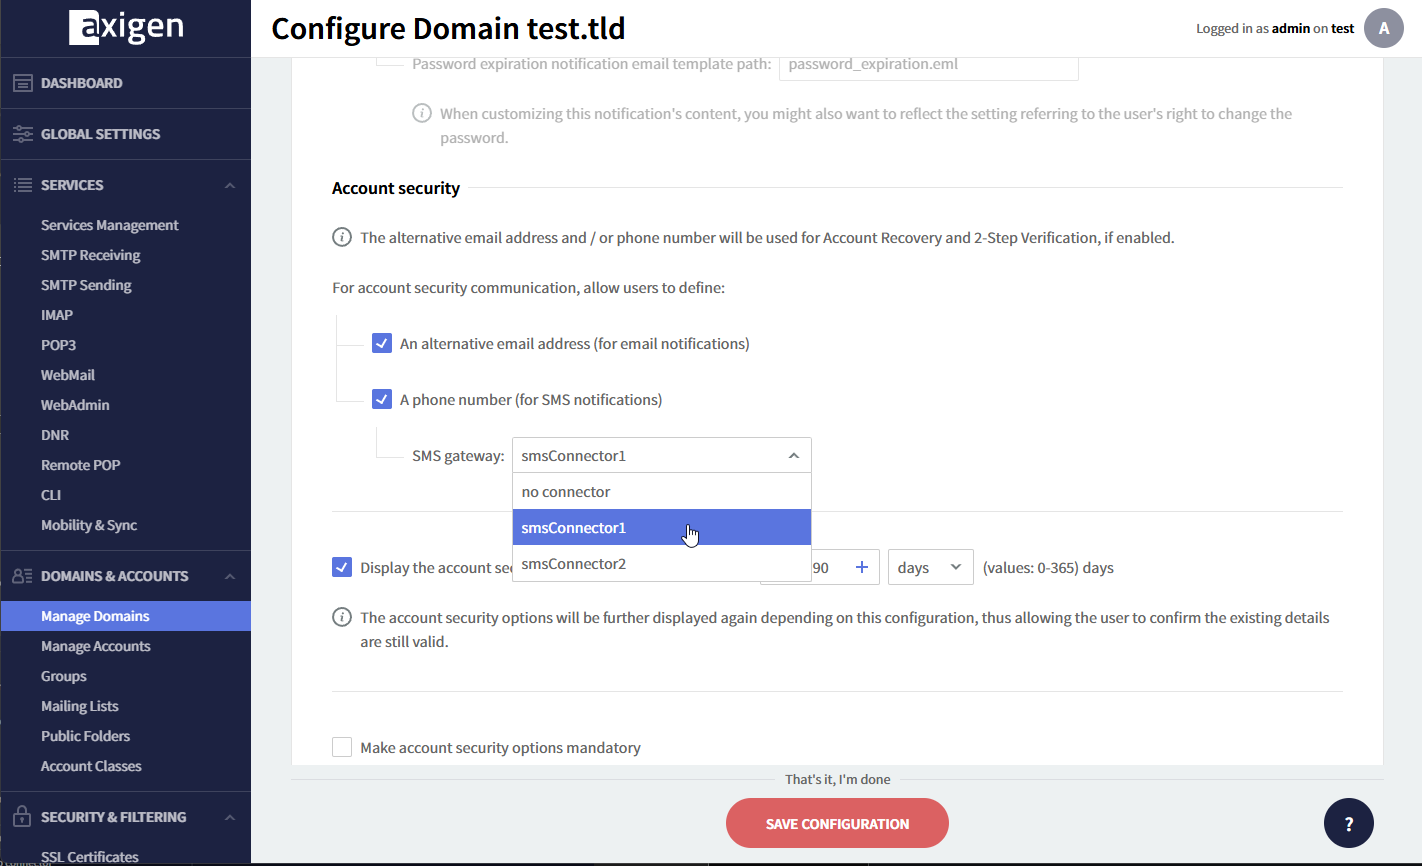
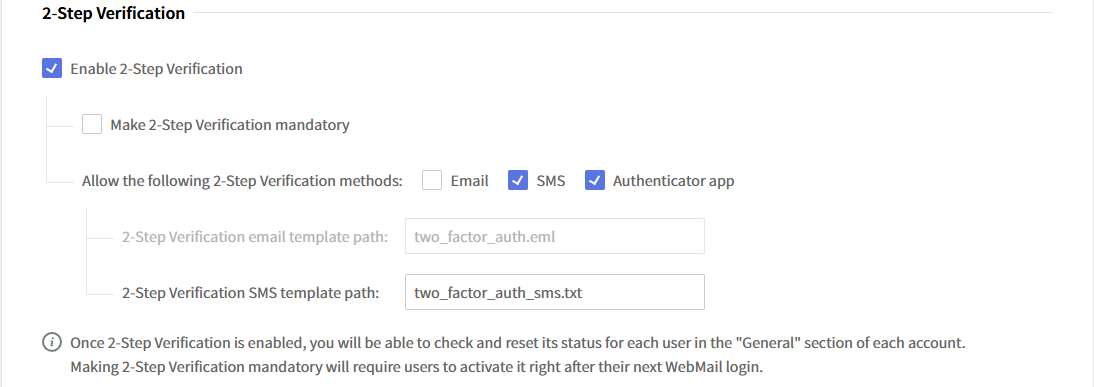
Now, scroll to the next section, 2-Step Verification
As mentioned, the “Authenticator app” is enabled by default, now tick the “SMS” option too and save the configuration.
End-user Configuration
Login to the WebMail interface and open the settings.
Click on “Turn on” button next to the 2-Step Verification
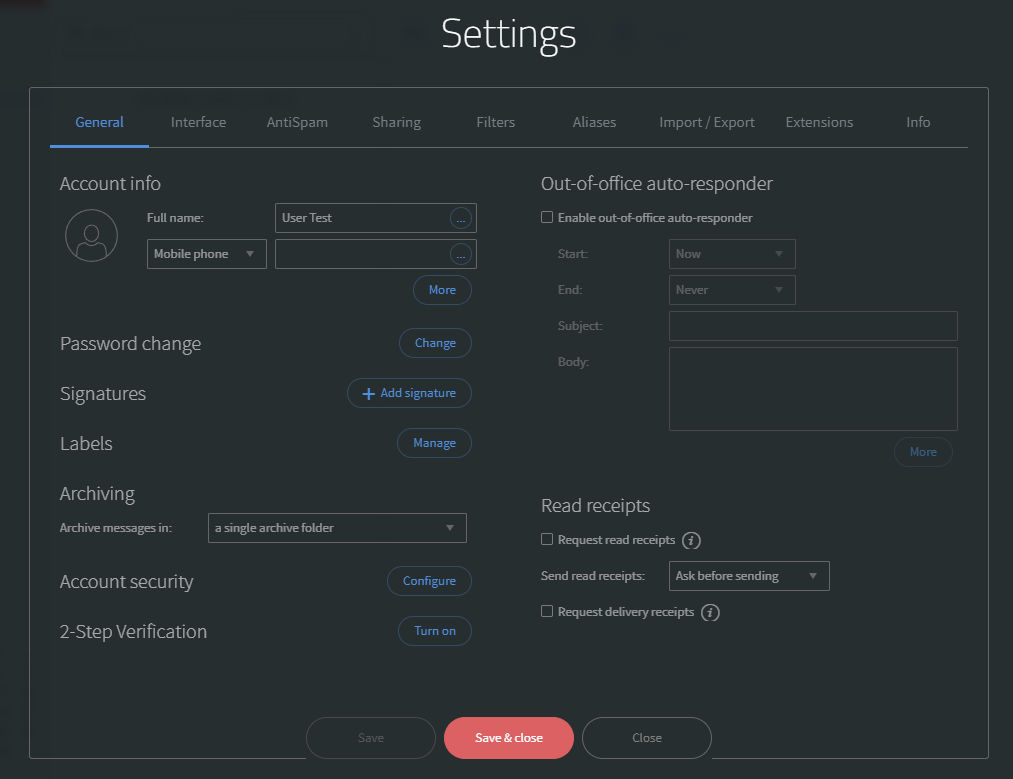
Click on the ”+ Add” button next to the Mobile phone number.
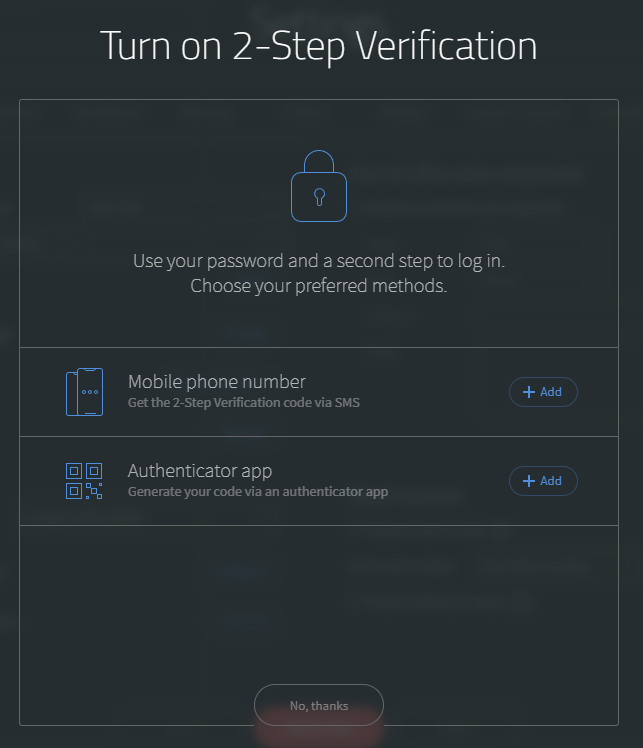
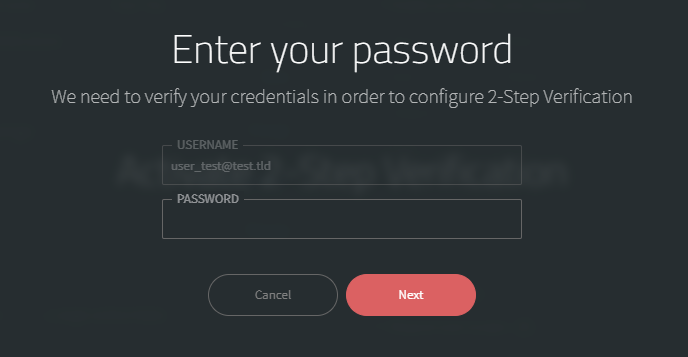
A password confirmation window will open, type in the account password and click “Next”.
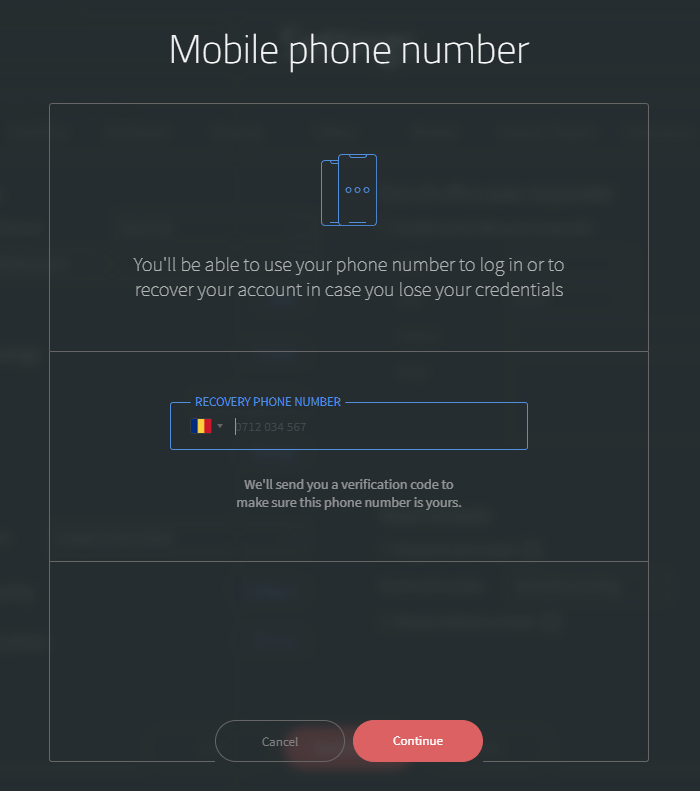
Select your country and type in your phone number.
An SMS containing the 2FA confirmation code will be sent to your phone number, type in the code.
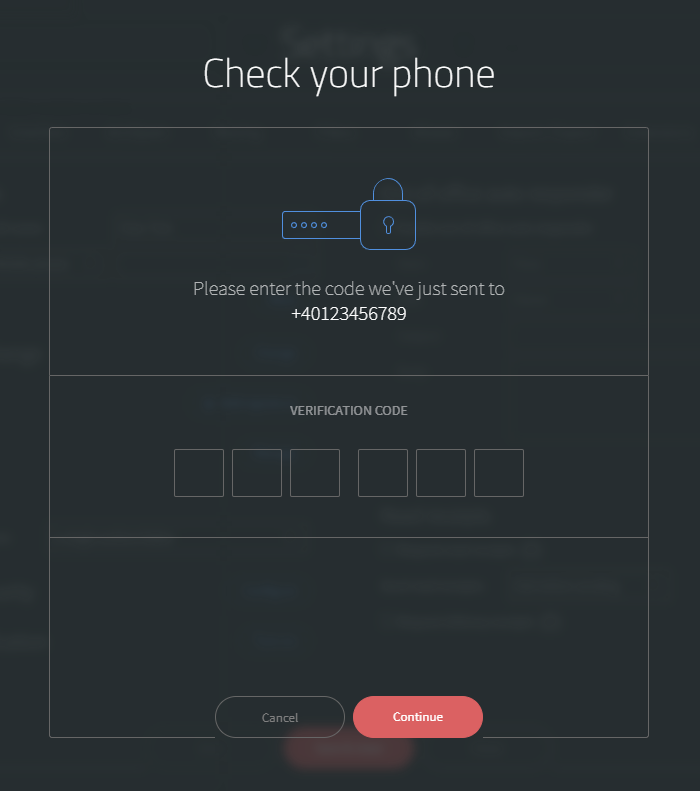
If the code was typed correctly, the window will close automatically meaning that the configuration was finished successfully.
Use-case Example
Confirming 2-Step Verification via SMS Works
-
Login to the WebMail interface
-
Type in your credentials
-
A new window will pop up asking for the verification code sent to your phone number
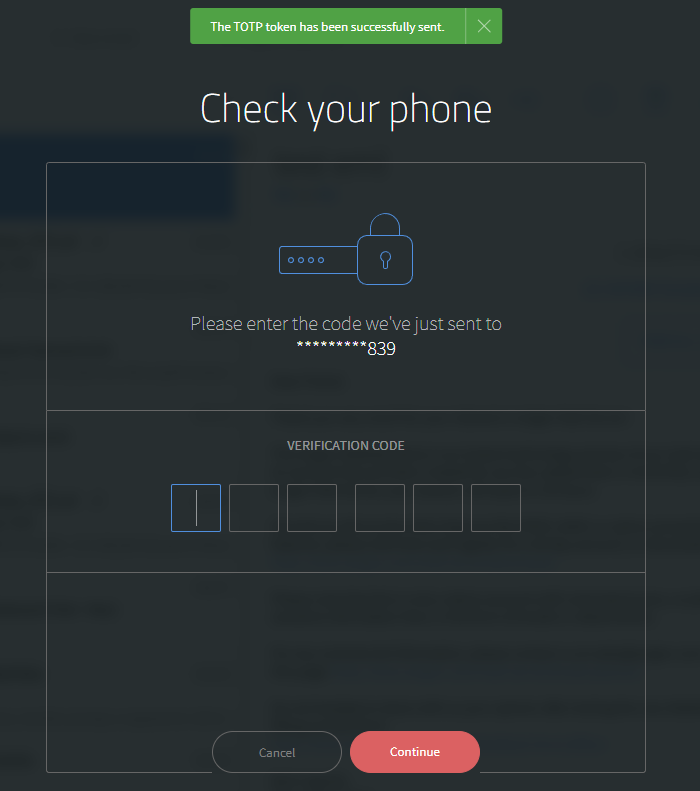
-
If the code was typed in correctly, you will successfully be logged in to the WebMail interface.