- Hardware & Software Requirements
- DNS Prerequisites
- Installing Axigen on Linux
- Installing Axigen on Linux (Axigen X2 & X3)
- Installing Axigen on Windows
- Deploying & Running Axigen in VMware & VirtualBox
- Deploying & Running Axigen in Docker
- Performing the Initial Configuration (Onboarding)
- Starting / Stopping / Restarting Axigen
- About Axigen's Architecture
- Services and Modules
- Supported OS / Platforms and Web Clients
To add a new account to an existing domain:
-
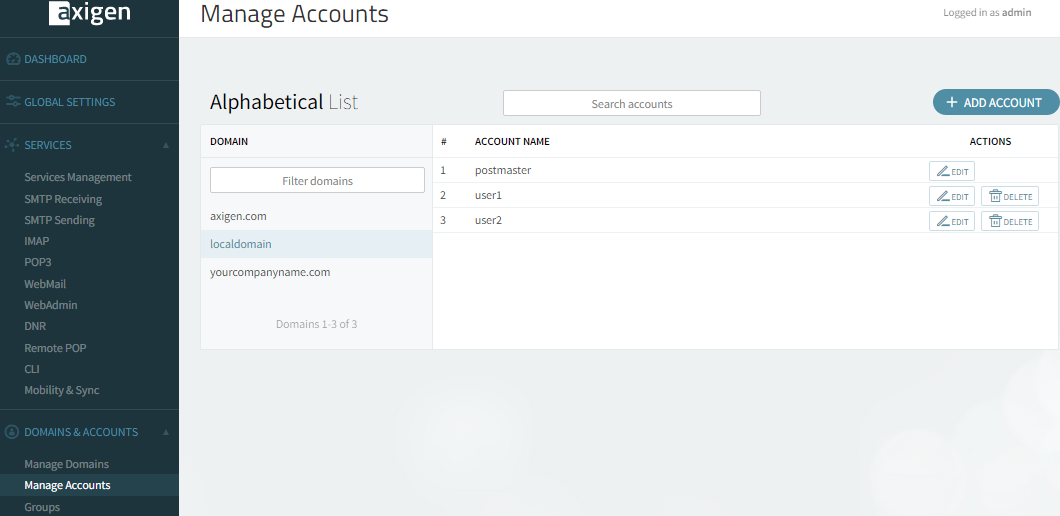
In the WebAdmin page, click on the "Manage Accounts" tab.
-
Click on the domain for which you want to display the existing accounts or to add a new account. In the screenshot below, no domain was selected.
-
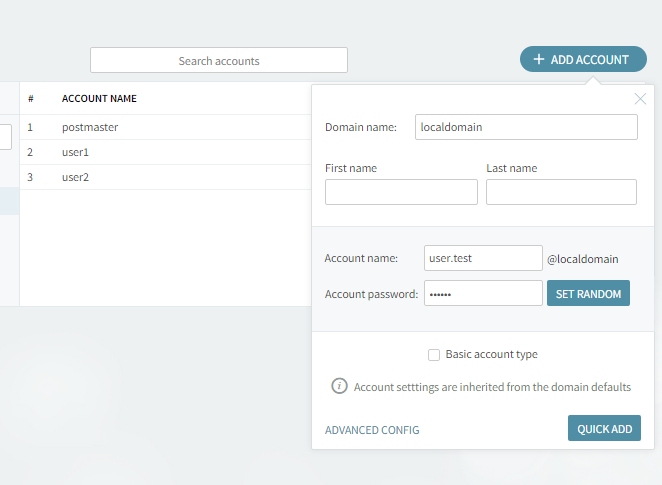
In order to create a new account, click the "Add Account" button. The domain you are creating the account in is displayed in the "Domain name" field if you have already selected a certain domain. If you press the "Add Account" button prior to the domain selection, you will have to type the desired domain. Specify a name for the account you are creating in the "Account Name" text field. Type a password of choice in the "Account password" text field or click the "Set Random" button to select a random password combination. When using this button, the password randomly assigned is displayed under it.
-
To add the account, click the "Quick Add" button. For advanced account settings, click the "Advanced Config" link and the pages below will be displayed:
By default, settings are inherited from the domain's account defaults. You can also set the user to inherit settings from an account class by using the "Inherit configuration details from" drop-down menu or explicitly configure the settings for the user. -
Click the "Save Configuration" button to save your changes.


