The "Acceptance & Routing" → "Routing Basic Settings" page allows you to configure message relaying and customize SMTP Outgoing actions for all or part of the email communication.
Allow / Disallow Relaying
Servers that Allow relaying from any IP will accept and try to deliver email messages no matter the destination or sender. This is called an "open relay" server. It is necessary to restrict relaying in order to avoid the server being flooded by spammers. Make sure you check the "Require authentication" option so relaying is possible only for users who have accounts on the server and can authenticate using a username and password.
If the "Allow relaying from any IP" is disabled (the related box is unchecked) the Axigen service will not relay any email messages. Only local delivery will be made.
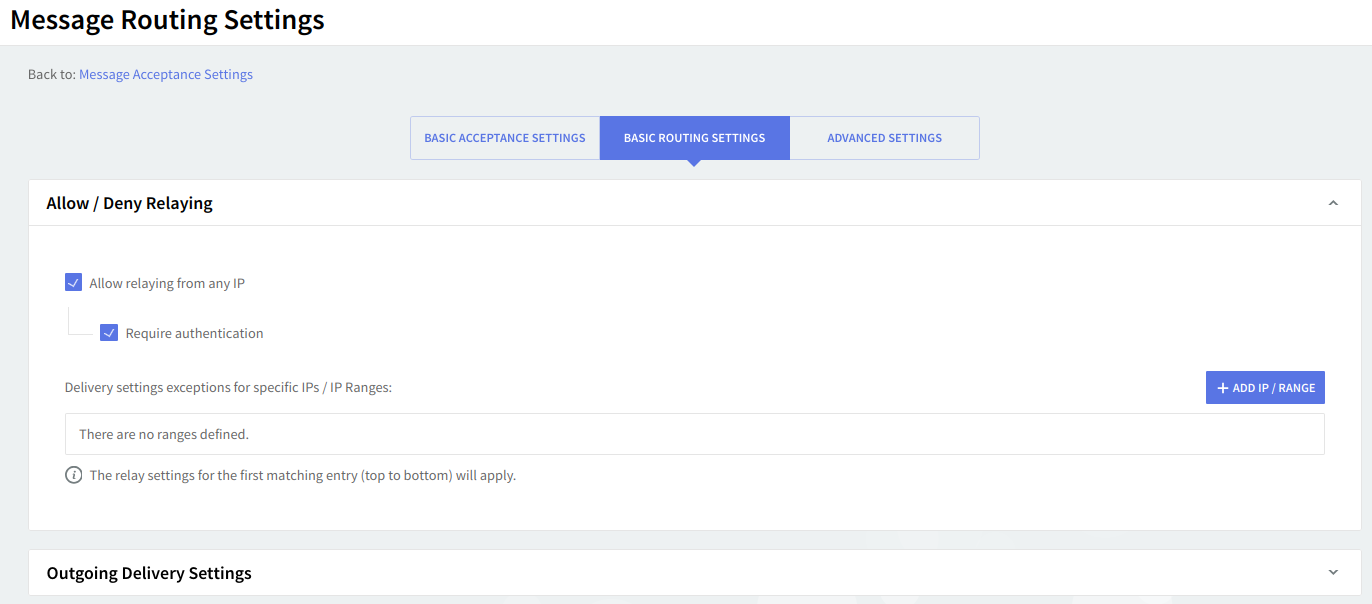
You can configure a list of IPs or IP ranges with specific delivery settings by adding them via the "Exceptions" section. To edit the details of an already added IP or range hit its corresponding "Edit" button, to delete it click its respective "Delete" button.
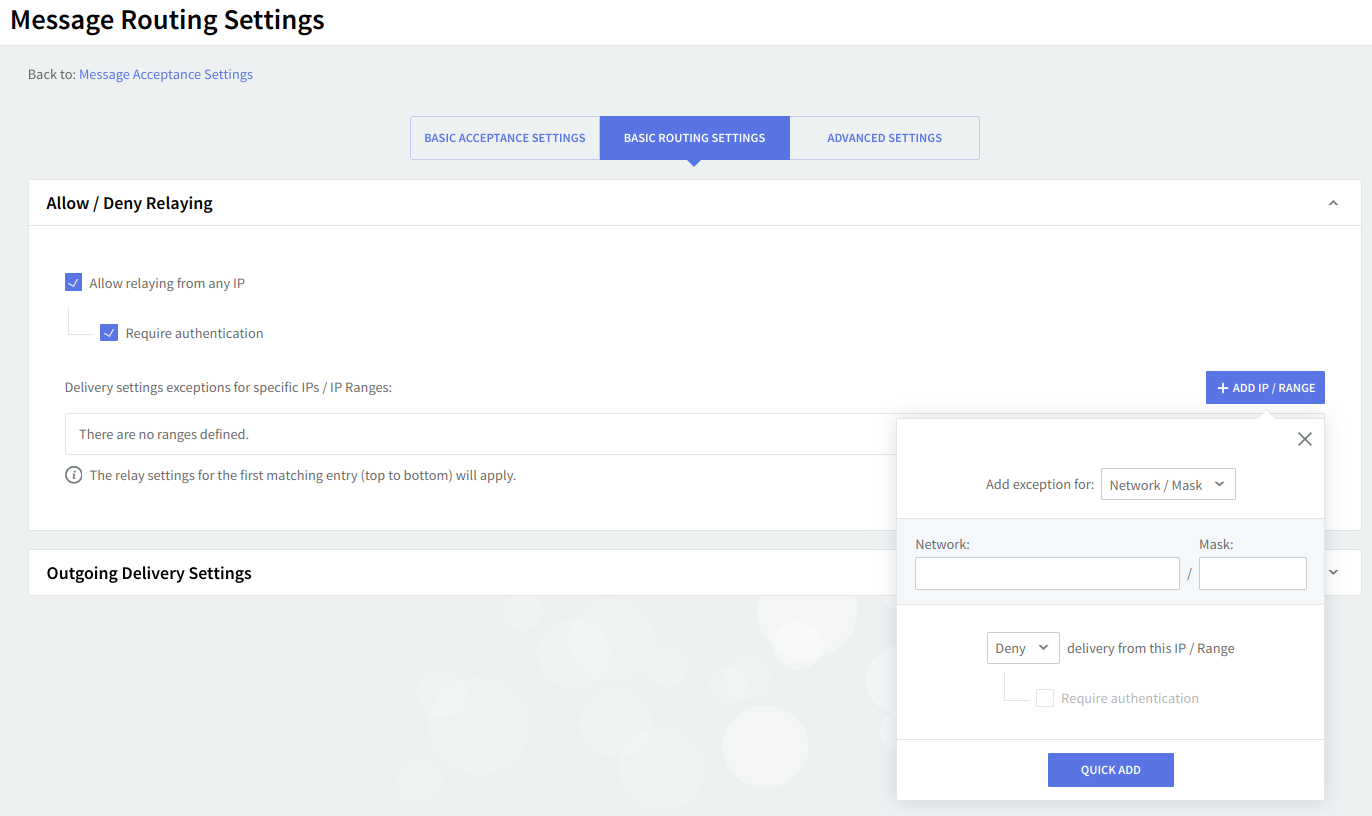
Should you like to add a new IP or IP range, hit the "Add IP / Range" button, select one of the available options: Network/Mask, IP Range, or Single IP, and fill in its corresponding details in the displayed text box.
An example of how to use the "Exceptions" section is available in our related article: How to allow unauthenticated relays from a specific subnet.
Outgoing Delivery Settings
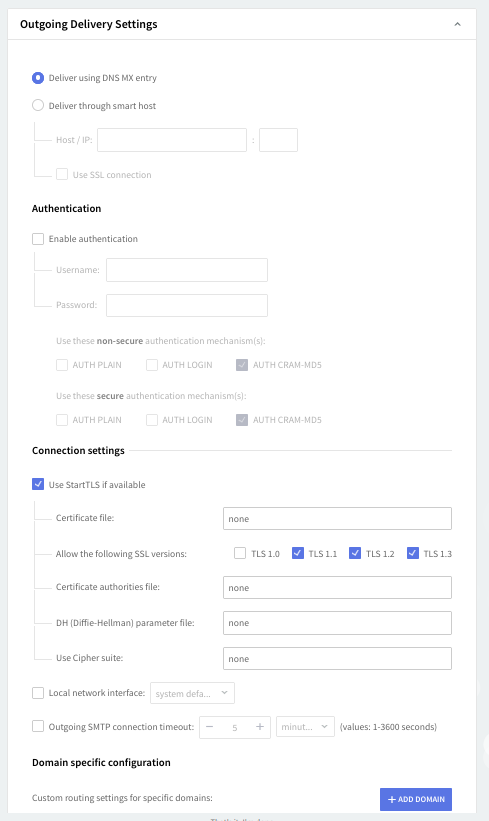
Select message delivery either through DNS MX entry or a smart host. If you choose the second option fill in the requested details in the "Host/IP" and "Port" text boxes and all messages will be sent to the specified host. To make sure the message transmission is secure check the "Use SSL connection" option.
Enable Authentication
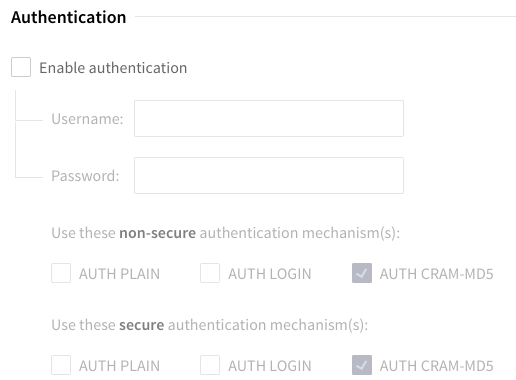
Should you like to enable username/password authentication when delivering messages through smart host check the box in front of the "Enable authentication" option and fill in the username and password details in the available text boxes.
You can also specify the authentication mechanism to be used. Available types are Plain, Login, CramMD5, and/or DigestMD5 (all types of authentication are allowed).
Connection Settings
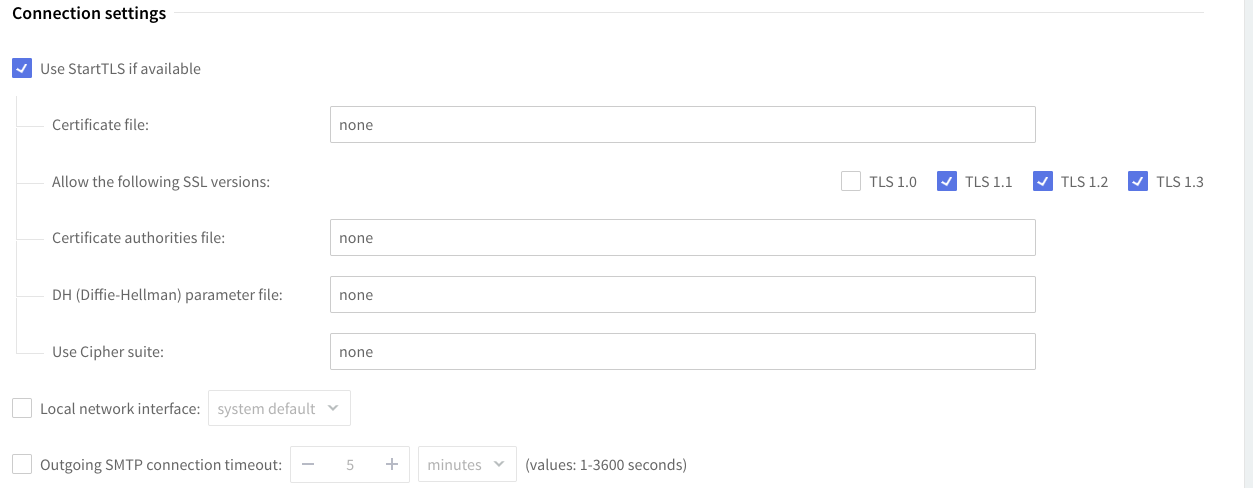
Enable the "Use StartTLS" if available option to establish a secured session before transferring any sensitive data (such as authentication details or message text when authentication is not required) if this type of encrypted session is supported by the peer server.
Should you like to have messages sent through a specific network interface check the box in front of the option called Local network interface, then use the drop-down menu to select between using the system default network interface or a custom one. In the latter case fill in the corresponding IP in the available text box.
To set a SMTP connection timeout for outgoing messages check the box in front of the "Outgoing SMTP connection timeout", then use the up and down arrows to specify the value. Use the drop-down menu to select the value of the timeout (seconds, minutes or hours).
Domain Specific Configuration

Set up custom routing settings for certain domains in the "Domain-specific configuration" section. To edit the details of an already added domain hit its corresponding "Edit" button, to delete it click its respective "Delete" button.
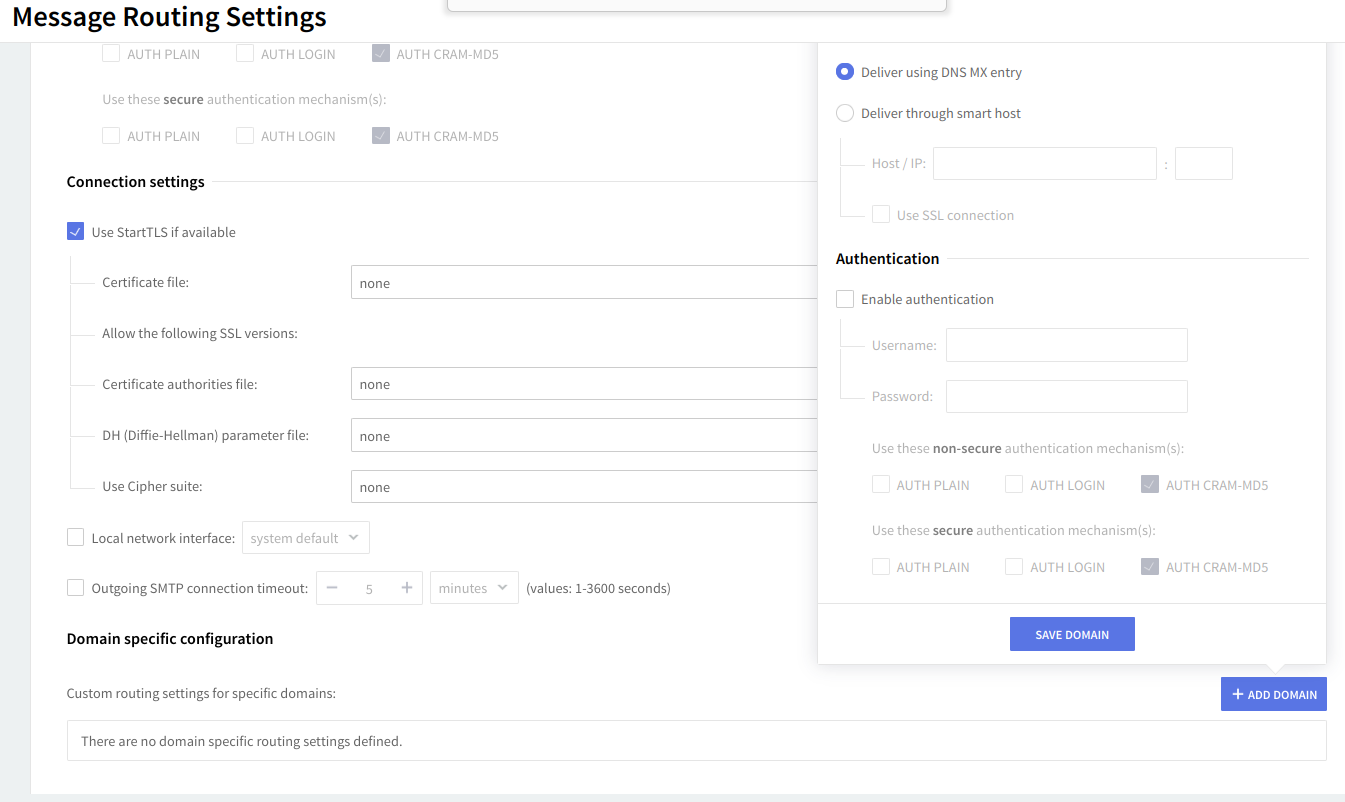
Should you like to add a new domain, click the "Add Domain" button, choose the desired options fill in the corresponding details.
When you are done configuring these parameters, remember to click the "Save Configuration" button to preserve your changes.