Updated: October 24, 2022
Within Axigen, you can set email account aliases for your users. By creating an alias, you are essentially creating an alternative email address bound to a specific user account, which can be used by that user for sending and receiving.
Aliases can be permanent (admin-managed) or temporary (user-requested). In this section, we will cover the management of permanent aliases.
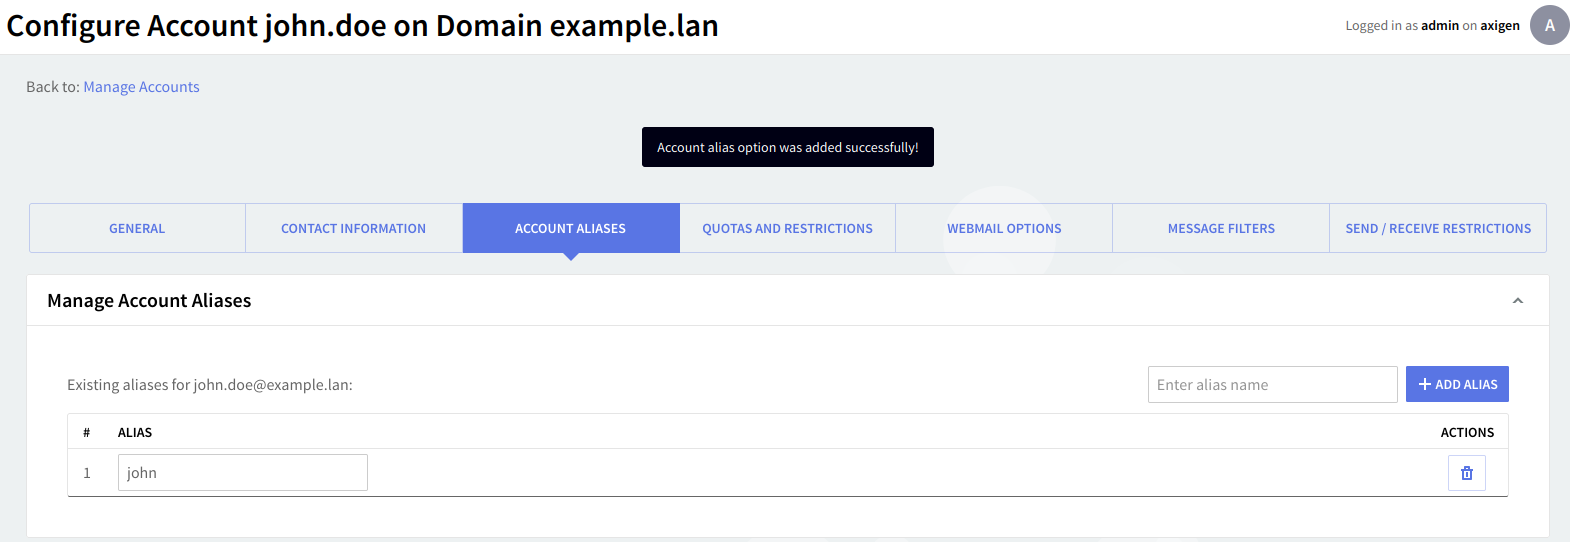
To create an account alias or a set of aliases, go to Manage Accounts → Account Aliases.
How to Create and Manage Permanent Account Aliases

An account alias is a secondary email address pointing to the account you are editing. For example, if you are currently editing the account test@mycompany.com previously created and you add alias@mycompany.com as an alias, all emails sent to alias@mycompany.com will be delivered to test@mycompany.com.
When adding an alias, only enter the username for the alias. The domain will be the same as the edited account's domain.
Each of the previously defined account aliases can be edited in the text field or deleted using their corresponding Delete buttons. To add a new alias, type its name in the upper right corner text field and hit the Add Alias button.

Account aliases are compound with the domain aliases to make the full set of email addresses a user can have.
For example, let’s say you have example.lan as your main domain and example.com as its domain alias.
Then you have the john.doe account under this domain, but you also want this user to be able to use the john alias, which is easier to remember by others. Next, John Doe needs a temporary alias for subscribing to a newsletter service without giving away his main email address; he requests this temporary alias from his WebMail – temporary aliases are randomly generated email addresses that have a limited lifetime. So John also gets the F0EF3C1D temporary alias.
This will result in John having the following set of email addresses that he uses to send and receive emails:
-
john.doe@example.lan
-
john.doe@example.com
-
john@example.lan
-
john@example.com
-
F0EF3C1D@example.lan
-
F0EF3C1D@example.com.
All these email addresses will appear in the From: email addresses drop-down in his WebMail and any reply or forward (via WebMail) to an email sent to one of the addresses below will be sent from that particular email address.
When you are done configuring these parameters, remember to click the Save Configuration button to preserve your changes.
For more information, review our guide on using Axigen email accounts for maximum efficiency, responsiveness, and productivity.