Updated: November 7, 2024
This short tutorial will show you how to use the WebMail Proxy service configuration. Through the menu options under Service Configuration in the Axigen WebAdmin, you can manage settings for:
-
Logging
-
Authentication and encryption
-
HTTP protocol
-
Instant messaging and WebMail proxy
-
Thread control parameters
-
Back-end server connection
Logging

You can select several types of messages to be logged for the WebMail Proxy service:
-
critical messages
-
error messages
-
warning messages
-
informational messages
-
protocol communication
To select which of these are to be logged, click the Log Level slider and move it to the left or the right. The selected types of messages will change color from gray to blue.
Log files can be stored using your internal log files, your system's log files, or within the log files located on a remote system. Use the Log drop-down menu to select where to have your log files saved.
Encryption and Authentication

If the Perform authentication on proxy option is selected, the proxy will perform credential checks. If left unchecked, the authentication will be performed on the backend server.
HTTP Protocol Options

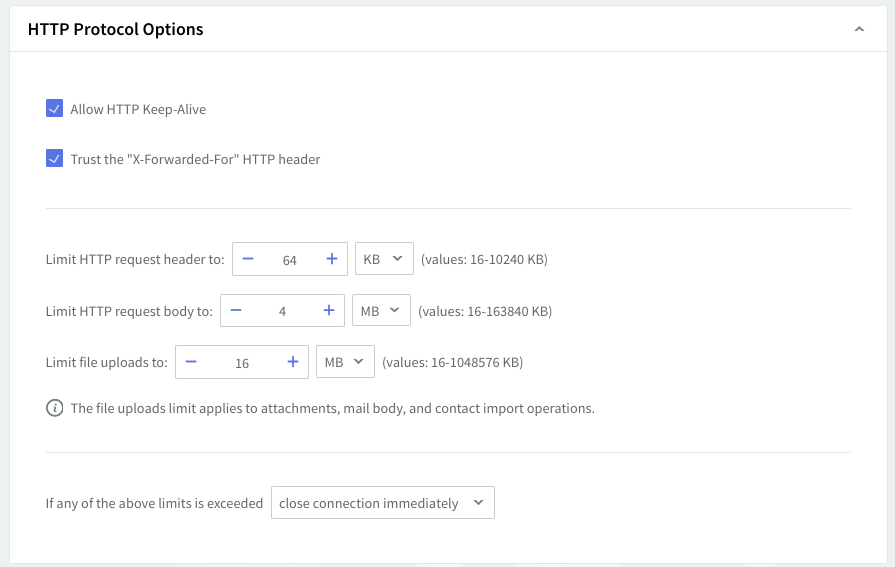
By checking the Allow HTTP Keep-Alive option, you allow permanent HTTP connections for the WebMail Proxy service.
Next, you can set the HTTP limits for WebMail Proxy requests. Use the Limit HTTP Request header to option in order to specify the maximum allowed size for incoming HTTP headers, and the Limit HTTP Request body to option to specify the maximum allowed size for incoming HTTP body.
The sizes for these two options can be set by using the up and down arrows, in KB or MB. The third option, Limit file uploads, can be used to set the maximum allowed size for incoming upload data. It applies to attachments, mail body, and contact import operations uploaded via the Webmail interface. The size for this parameter can be set by using the up and down arrows, in KB, MB, or GB.
Select the appropriate action to be taken when the incoming data is over the set limits by using the If any of the above limits is exceeded option. Use the drop-down menu in order to choose between closing the connection immediately or allowing all data to be sent.
Instant Messaging Proxy Options

In the Instant Messaging Options section, you can specify where to route the requests coming from the Instant Messaging client, by simply filling in the HTTP URL of the IM back-end value.
WebMail Proxy Options

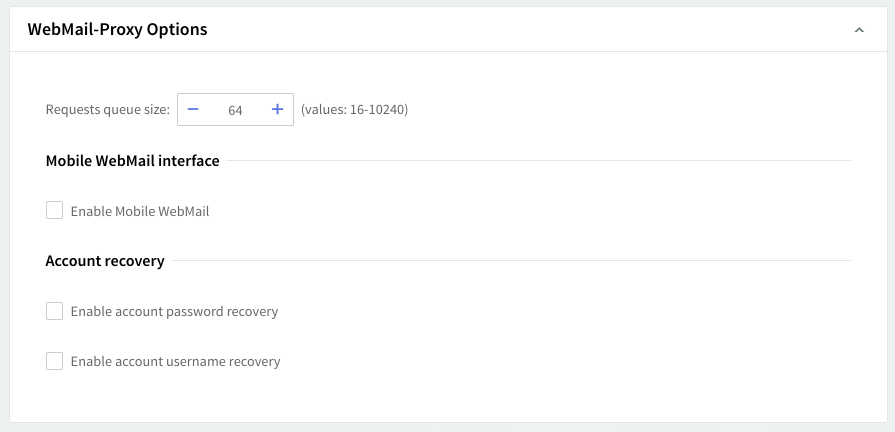
Use the up and down arrows or edit the text field to set the maximum number of pending requests to the back-end (each back-end has an associated request queue).
In the WebMail interface sub-section, you can choose the WebMail interface type that users can access and the default interface that will be used when accessing the WebMail service.
If you wish to allow mailbox access via the WebMail Mobile interface from mobile devices, through the proxy, check the Enable Mobile User Interface option.
Thread Management

Thread management allows you to set different numbers of processing threads for the WebMail Proxy service depending on your traffic load. First, using the up and down arrows, set a number of threads to be allotted when the WebMail Proxy service is started. To have a different number of threads for peak periods, check the overload option and use the up and down arrows to choose the thread number.
Back-end Server Connection Settings

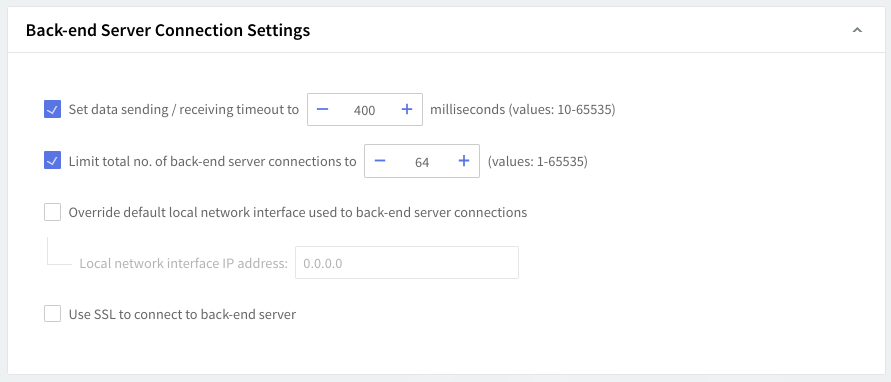
To set a specific sending and receiving timeout, first check the respective option in the Back-end Server Connection Settings section. The timeout is computed in milliseconds (use the up and down arrows or edit the respective text field to increase or decrease the default value) and ranges between 10 and 65535.
You can limit the total number of parallel requests to the same back-end on different TCP connections by checking the corresponding option. Use the up and down arrows or edit the respective text field to increase or decrease the default value — possible values range between 1 and 65535 connections. When a request for a specific back-end is incoming, if all connections are busy (servicing requests) and the limit is not reached, a new connection is created. After the set limit is reached, the request remains in the requests queue associated with the specific back-end.
In order to overwrite the default local network interface used for back-end server connections, check the corresponding option and type the respective interface in the Local network interface IP address field.
To use a secure (SSL-enabled) connection when accessing the back-end server, please check the corresponding option in the Back-end Server Connection Settings section.
When you are done configuring these parameters, remember to click the "Save Configuration" button to preserve your changes.